Stripe provides API keys that let you integrate payment processing, billing, and financial data into your applications. This guide walks through finding and creating API keys in the Stripe Dashboard.
For a unified approach to accounting integrations, check out the Apideck Stripe connector, which lets you pull Stripe data alongside 30+ other accounting platforms through a single API.
What is Stripe?
Stripe is a payment processing platform that enables businesses to accept online payments and manage recurring billing. Through its API, you can access financial data including customers, invoices, payments, subscriptions, and transaction history.
Prerequisites
Before you start, make sure you have:
- A Stripe account
- Admin or developer access to the Stripe Dashboard
Finding Your API Keys
Stripe provides two types of API keys: publishable keys (for client-side code) and secret keys (for server-side code). Each type has both test and live versions.
- Log into the Stripe Dashboard.
- Click Developers in the left sidebar.
- Select API keys from the menu.
Your publishable key (pk_live_ or pk_test_) and secret key (sk_live_ or sk_test_) are displayed here. In test mode, you can reveal the secret key as many times as needed. In live mode, you can only reveal a secret key once, so copy and store it immediately.
Creating a Restricted API Key
For better security, you can create restricted keys that limit access to specific resources. This is recommended when integrating with third-party services.
- In the API keys page, click Create restricted key.
- Give the key a descriptive name.
- Set permissions for each resource type. For read-only integrations, select Read for the resources you need access to.
- Click Create key.
Common permissions for accounting integrations include read access to: Customers, Charges, PaymentIntents, Invoices, Subscriptions, and Products.
Test Mode vs Live Mode
Stripe maintains separate environments for testing and production:
- Test mode uses keys starting with
pk_test_andsk_test_. No real money is processed. - Live mode uses keys starting with
pk_live_andsk_live_. Real transactions occur.
Toggle between modes using the Test mode switch in the Dashboard. Make sure you're using the correct keys for your environment.
Common Mistakes
Exposing your secret key: Never include your secret key in client-side code, commit it to version control, or share it publicly. Treat it like a password.
Using test keys in production: If your integration isn't processing real payments, verify you're using live mode keys, not test keys.
Overly permissive keys: Use restricted keys with minimal permissions rather than your main secret key. This limits potential damage if a key is compromised.
Forgetting to rotate keys: If you suspect a key has been exposed, roll it immediately from the API keys page.
Rate Limits
Stripe's API enforces rate limits to ensure platform stability. The default limit for most endpoints is 25 requests per second, though Stripe may increase this for accounts with higher usage. Some endpoints have stricter limits (the Search API and Files API are limited to 20 operations per second). Test mode has lower limits than live mode. If you exceed these limits, Stripe returns a 429 Too Many Requests response.
For high-volume integrations, implement exponential backoff and cache frequently accessed data.
Connecting Stripe via Apideck
Apideck's unified Accounting API lets you connect to Stripe alongside platforms like QuickBooks and Sage through a single integration.
Note that Apideck's Stripe connector uses OAuth rather than standard API keys. You'll need to create a Stripe App first to get your Client ID, Client Secret, and Channel Link ID. See our How to Create a Stripe App guide for the full walkthrough.
Configuring the Connector
With your Stripe App credentials ready, open the Apideck dashboard and navigate to Configuration > Accounting > Stripe.
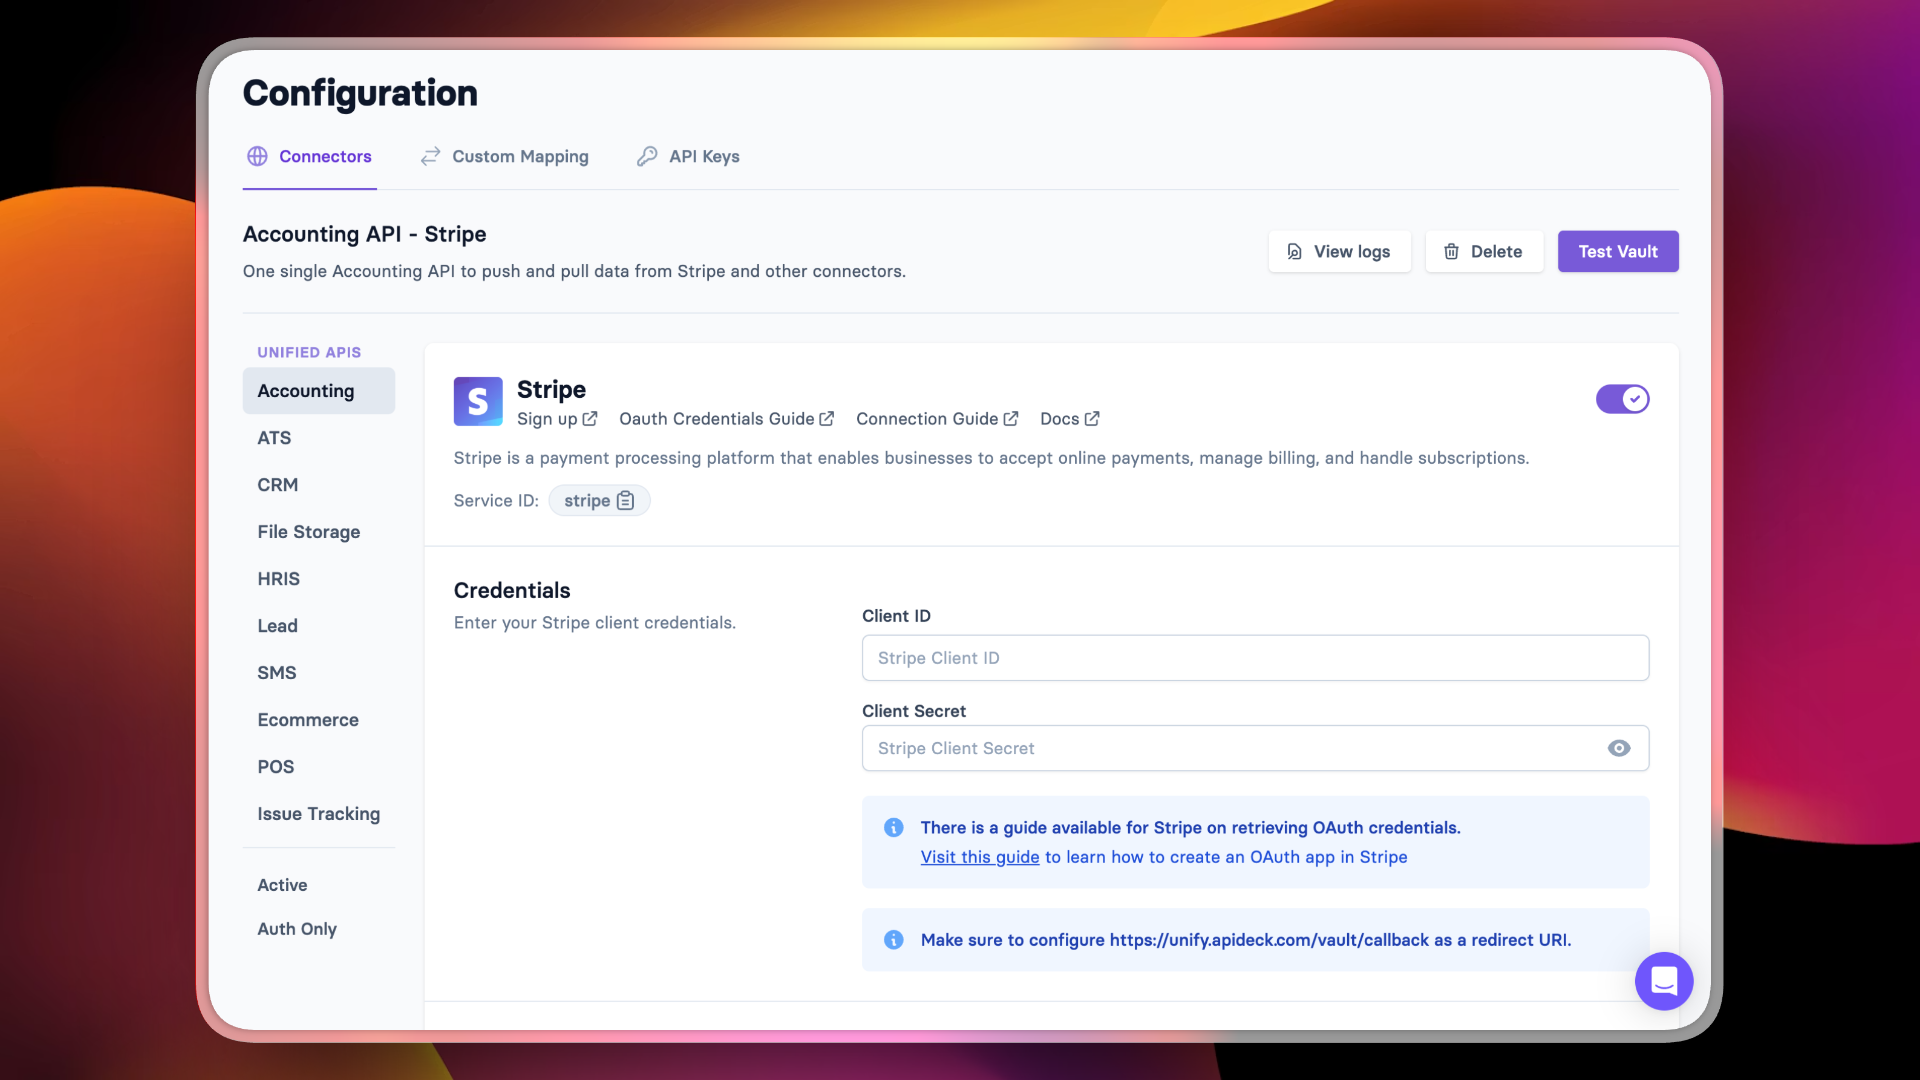
Enter your Client ID and Client Secret, then scroll down to configure scopes and add your Channel Link ID.

What Your Users See
When your users connect their Stripe account through Vault, they'll be prompted for their Stripe Account ID (found under Settings > Account details in Stripe, starts with acct_).
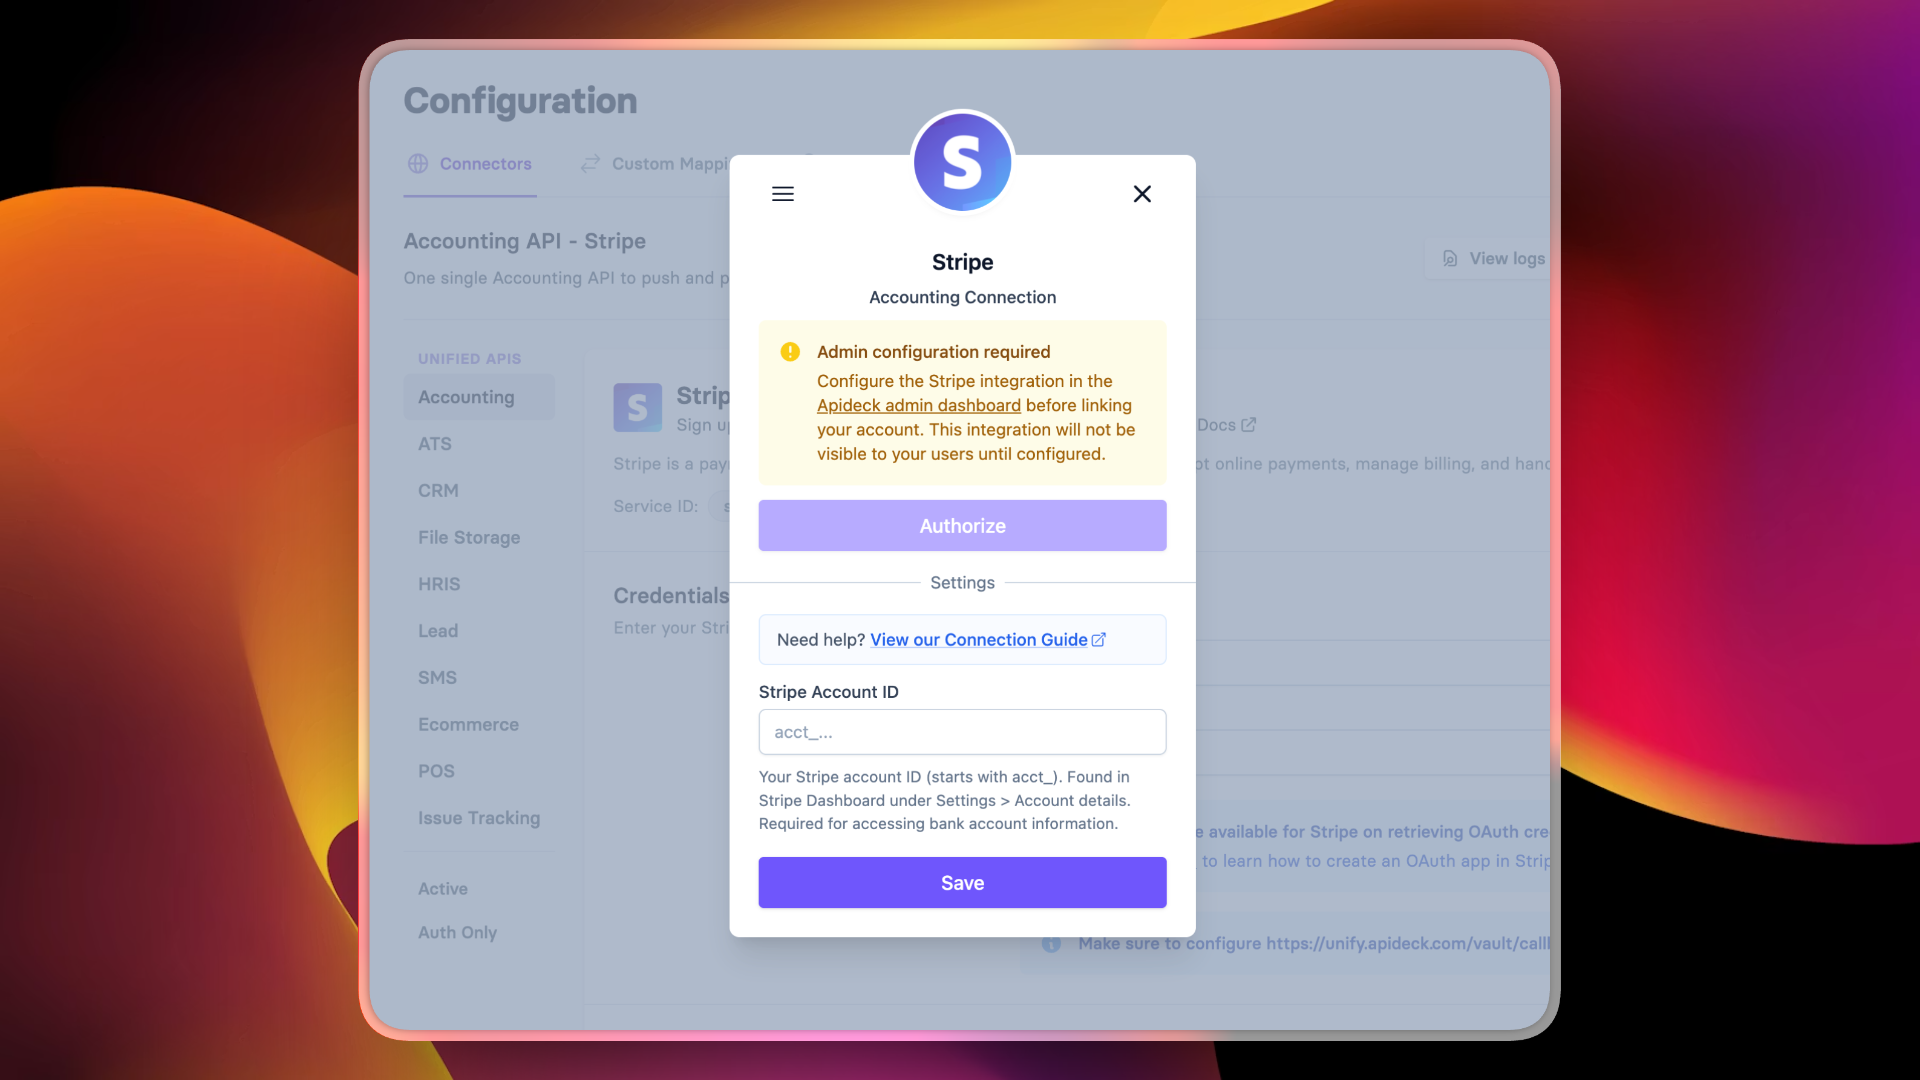
After authorization, Stripe data flows through Apideck's unified API alongside your other accounting integrations.
Ready to connect to Stripe and 30+ other accounting platforms through a single API? Get started for free.
Ready to get started?
Scale your integration strategy and deliver the integrations your customers need in record time.